Completely Remove XMLCheck
XMLCheck is a helpful third-party software that provides computer users with many useful features and tools. However, many users got difficulty and problem in uninstalling it from the computer. Below, we have listed possible problems when uninstalling XMLCheck. If you also got such problem, you can find useful solution for it.
It seems that there are many computer users who have difficulty in uninstalling software like XMLCheck from the system. And some of them get into trouble when uninstalling the software and some of them can uninstall the software but get problem after the uninstallation. Some possible problems that people run into:
- *XMLCheck can not be uninstalled
- *XMLCheck can not be completely uninstall and removed
- *XMLCheck or other similar software can not be installed or updated again on the computer
- *The computer system runs much slower after XMLCheck is uninstalled
- *The computer gets strange errors
Causes of the above problems :
- *XMLCheck does not appear in the program list of Add/ Remove Programs
- *The uninstaller of XMLCheck can not completely remove all associated files
- *There is some software that is not compatible with XMLCheck
- *There are many remnants left in the registry and hard drive
- *The .dll, .sys or other files shared with other software are deleted
Automatic XMLCheck Uninstall Method (Recommended)

Manually Uninstall XMLCheck
Windows XP Users
1. Exit XMLCheck in your computer
2. Click Start and click Control Panel
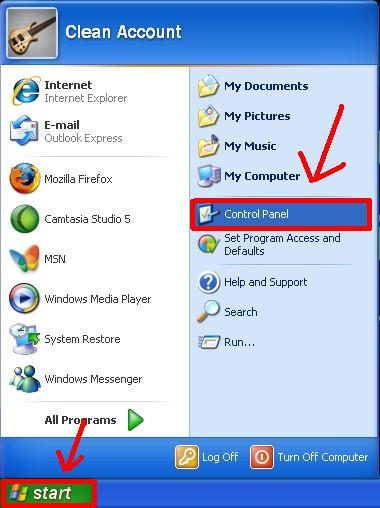
3. Click Add or Remove Programs
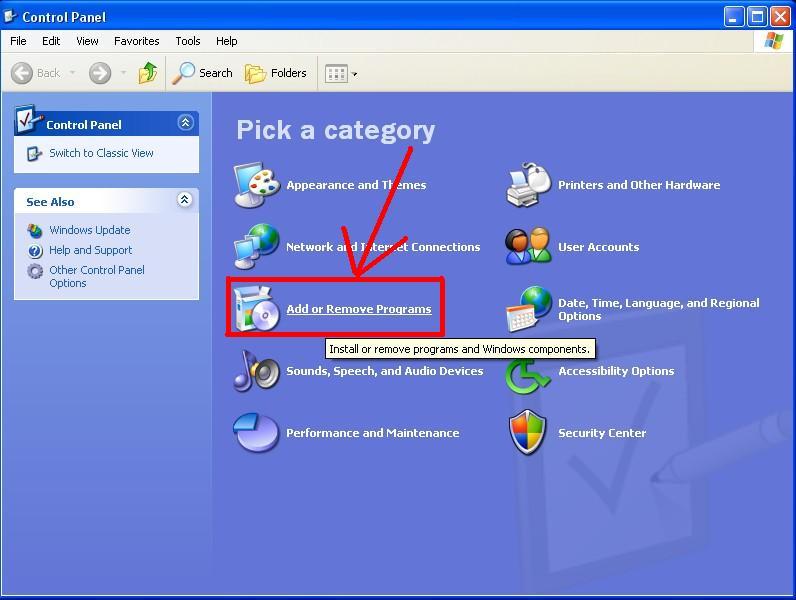
4. Loate XMLCheck and click Remove button
5. Click OK or Yes to continue
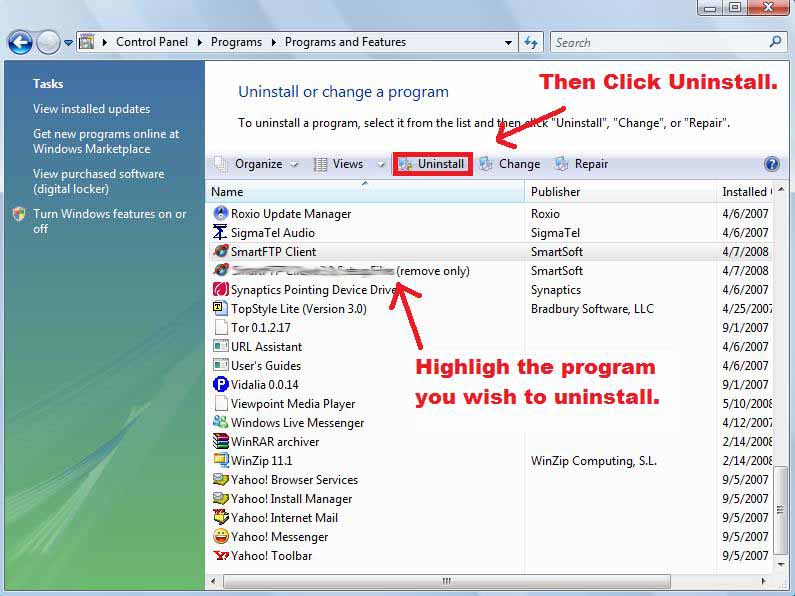
Windows Vista and 7 Users
1. Click Start and then Control Panel
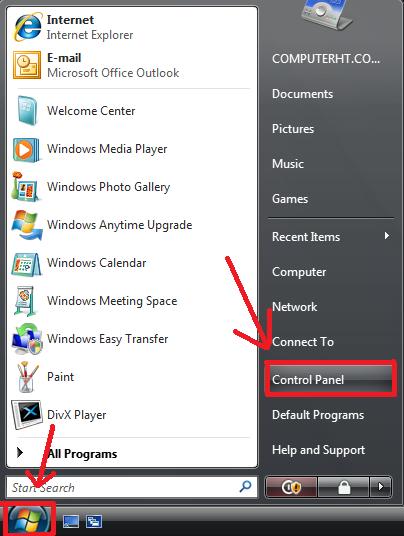
2. Click Uninstall a program
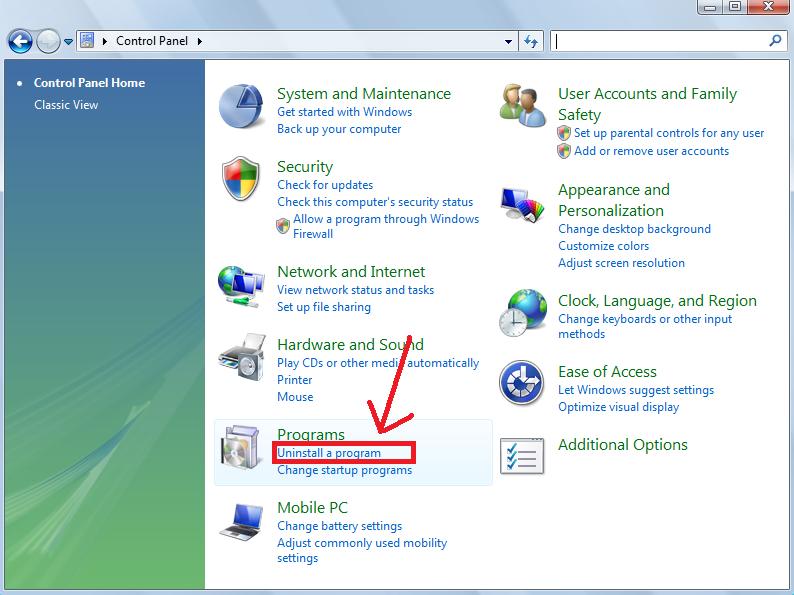
3. Find XMLCheck and click Uninstall
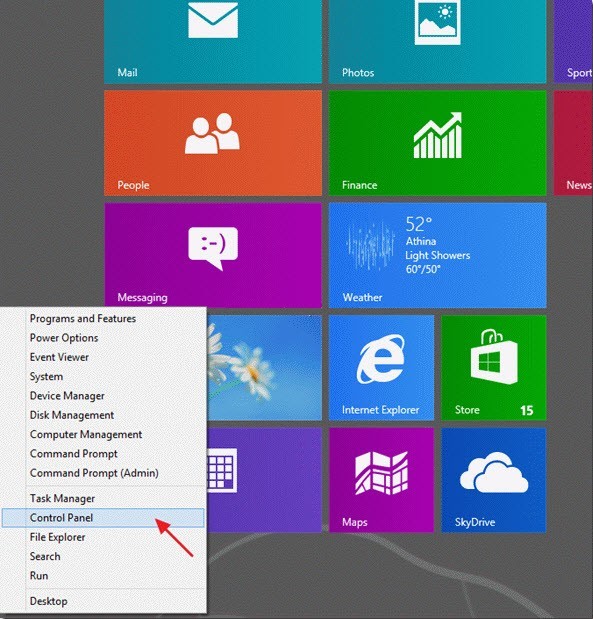
Windows 8 Users
1. Right-click in the screen's bottom-left corner and click Control Panel from the pop-up menu.
2. Click View by Small icons
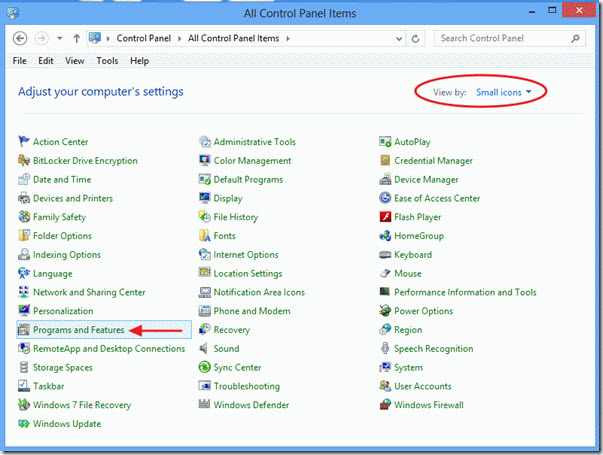
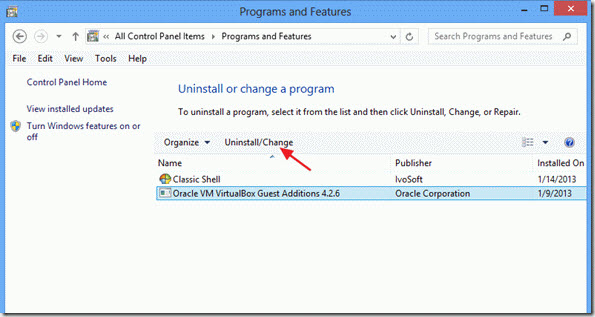
3. Highlight XMLCheck and click Uninstall
Manually Remove XMLCheck from Windows Registry
It's very risky to manually remove entries in registry. If you do not have sufficient computer skills, please try the automatic uninstall method.
1. Open the Registry Eidtor
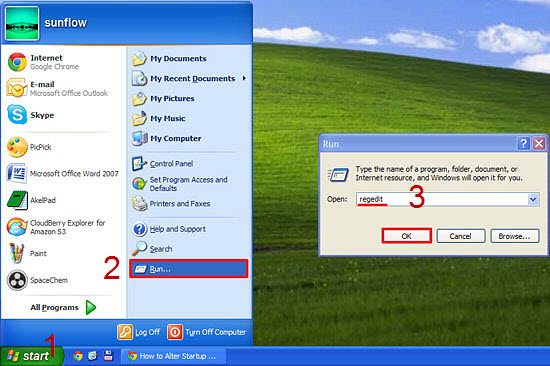
Windows XP Users
Click Start, click Run, type in regedit and hit OK
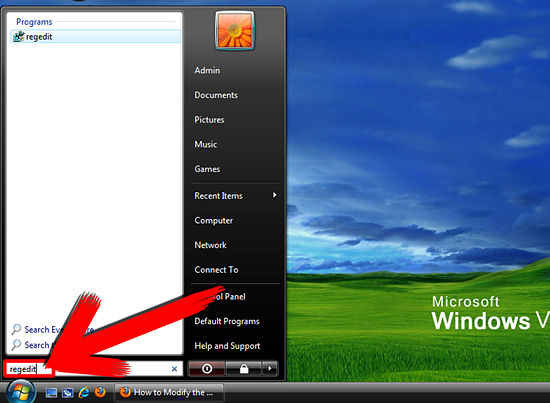
Windows Vista and Windows 7 Users
Click Start and type in regedit
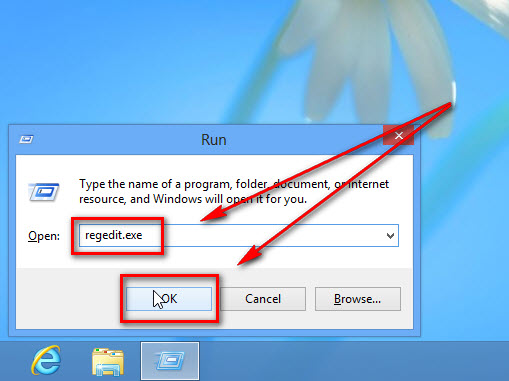
Windows 8 Users
Press "WIN+R" key combination to launch RUN dialog box then type regedit and press Enter
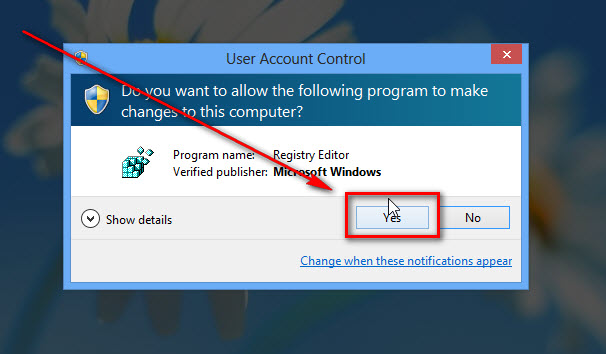
If you see a UAC dialog box, click "Yes" to open the Windows 8 Registry Editor.
2. Delete registry entries of XMLCheck CAREFULLY
- *HKEY_CURRENT_USER\Software\XMLCheck
- *HKEY_LOCAL_MACHINE\SOFTWARE\XMLCheck
3. Search throughout the hard drive and delete all associated files
- *C:\Program Files\XMLCheck
- *C:\Documents and Settings\A\Application Data\XMLCheck
Automatic XMLCheck Uninstall Method (Recommended)
As you can see, it's very complicated and time-consuming to manually uninstall XMLCheck from your computer. And if you delete other files by mistake, you may receive computer errors and get additional troubles.
So, it's recommended that you use an automatic third-party uninstaller to uninstall XMLCheck and completely remove all of its components with ease. The uninstaller can automatically scan and find out all registry keys, exe files, DLL files, drivers, and other components in every corner of the computer and then thoroughly delete all of them. And you do not need to know which file and registry key belongs to the program and whether it will destroy your PC if you delete it. Therefore, completely uninstalling a program will not be that difficult for you any more.
Awards